

It’s finally starting to feel like spring! With the weather warming up but COVID-19 stay-at-home extending into a third month, we’re all starting to go a little stir-crazy. This year we’re seizing the opportunity to focus our attentions a little closer to home, namely upgrading our neglected apartment patio to include a tiny outdoor “kitchen” in literally 2 sq ft of space.
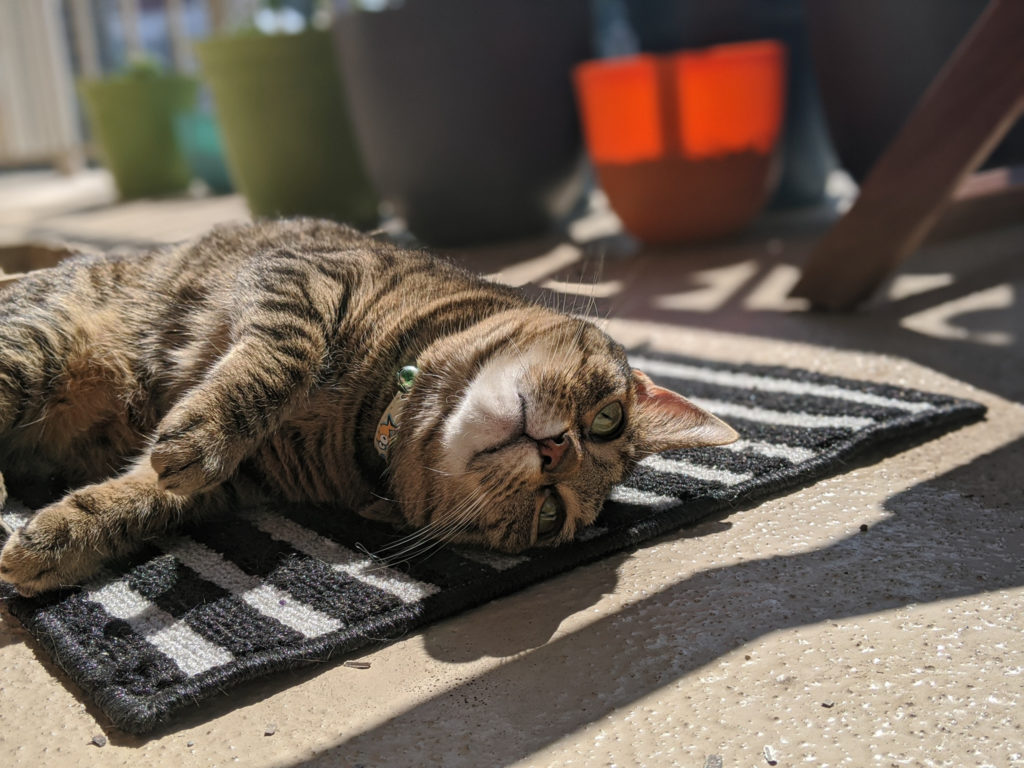
With our better outdoor space, we actually get to use our patio to get some much-needed sunshine and Vitamin D — and still maintain safe social distancing. We’re growing a tiny “victory garden” of container veggies, enjoying afternoon drinks on the patio, and eating outside as much as humanly possible. Our cat, Meatball, is loving sunning outside while we’re using the patio too!

For me, the best part of warmer months is cooking and eating alfresco (bbq! campfire s’mores! cumin lamb skewers on the grill!). So we found a way to cook outside on the patio in our city high-rise apartment. There aren’t a lot of parts involved, and everything turned out so perfectly that I just had to share.
The Setup
Head’s up: This post may contain affiliate links: if you click through to purchase or sign up for something, I may earn a small commission — at no additional cost to you. Prices are approximate and current at time of publication. For more info, check out my policy here.
This post features items that are not being used as the manufacturer intended. The Rice Lover 小彧米的厨房记 is not liable for any product failure, injury, or damage resulting from ideas on this site.
Our Outdoor Kitchen Base
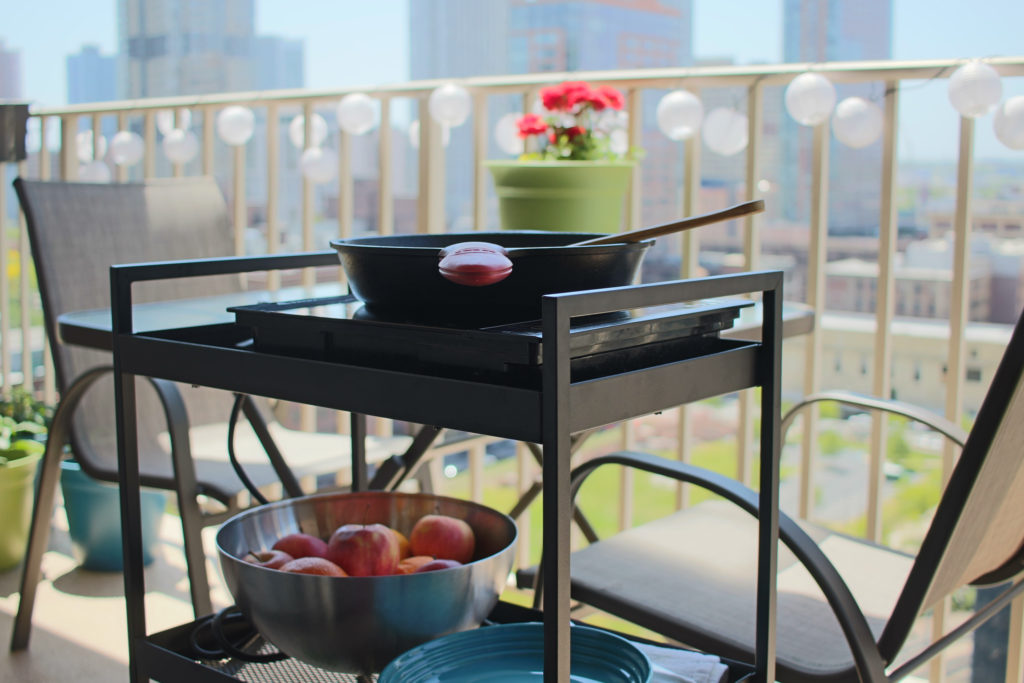
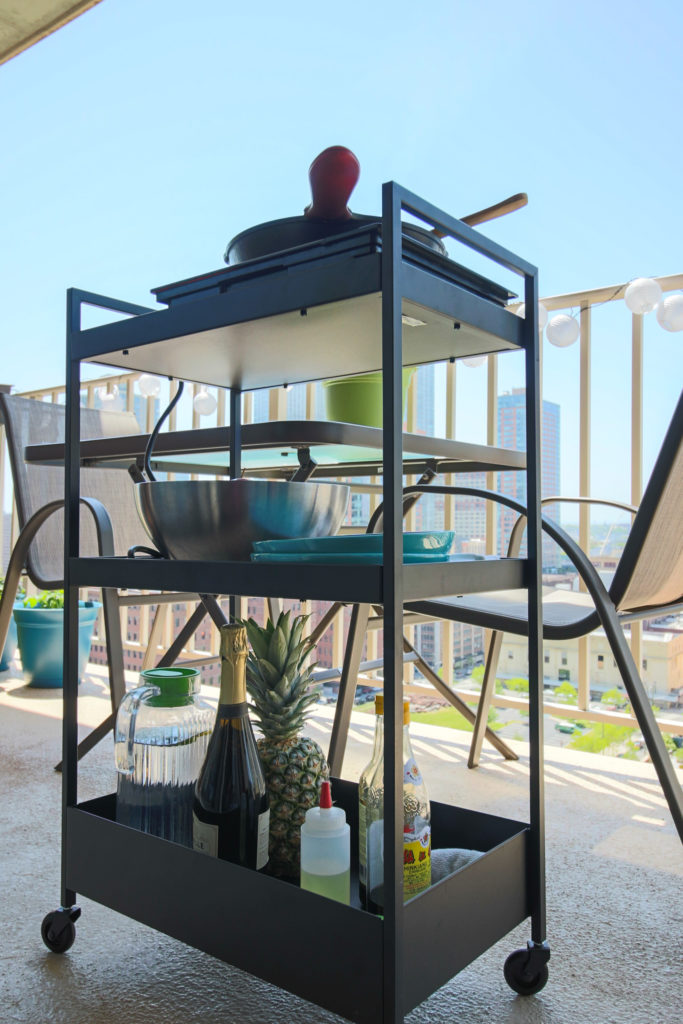
I promised outdoor cooking with a tiny footprint, and since this is an apartment outdoor kitchen, multi-tasking is a must. Our tiny outdoor kitchen is on wheels, in the form of a Ikea Nissafors kitchen/bar cart ($25 well-spent). It takes up only 1.62 sq ft of balcony floor space, and the three tiers are perfect for storing everything we need to cook outside.

We’ve been using it with
- top tier: a work surface / cooktop
- middle tier: dishes, snacks, and serving utensils
- bottom tier: a bottle of wine — hello, rosé season! — plus all necessary ingredients and utensils for cooking
I picked this particular cart because the top two shelves are shallow for easy access, while the taller bottom tier keeps our bottle of wine and other stuff upright. Roll it out the door, and you have the perfect, tiny, mobile outdoor kitchen setup!
This Nissafors cart is really versatile, so we’ll be bringing it inside to use as a bar cart or kitchen storage during the winter. For now, we’re living not-so-large on our little apartment patio.
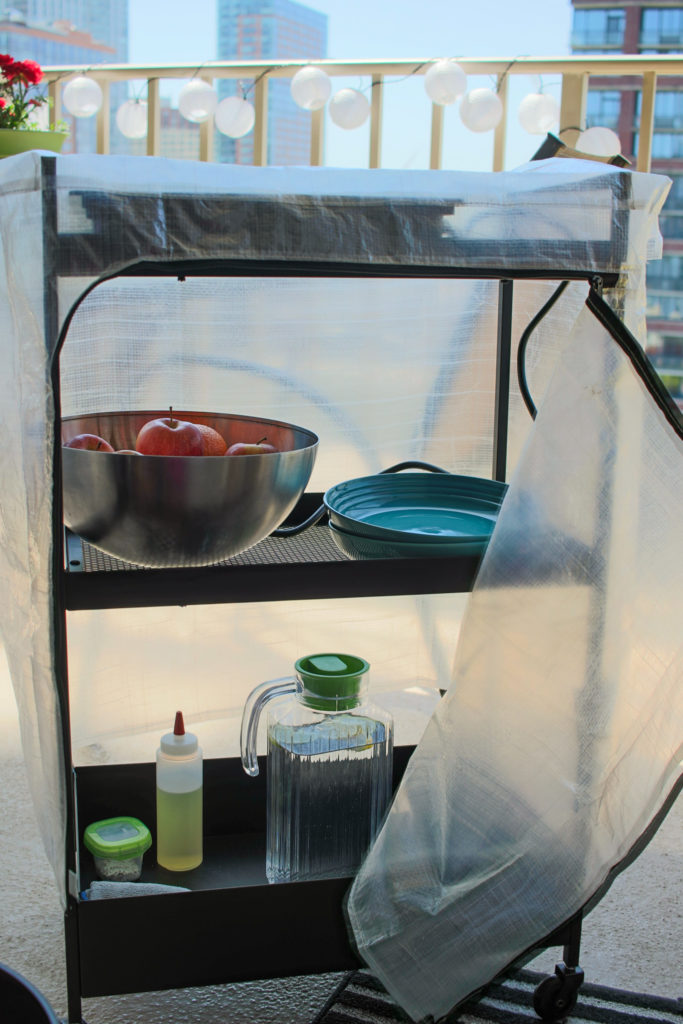
Protection from the elements
We live in a city high-rise; our balcony is covered so we don’t get much rain. For spring and summer, we plan mostly to leave our cart outside, protected by a rain and dust cover. We could not believe how perfectly the Ikea Hyllis clear cover ($3) fit our Nissafors cart.
If your outdoor space is fully exposed to the elements, I would either: buy an outdoor cart specifically, or spray your Nissafors with clear anti-rust spray (like this one on Amazon) in addition to using the cover.
An Induction Cooktop
Of course, this wouldn’t be much of a tiny outdoor kitchen without a heat source. Since we’re not allowed to have grills on our tiny apartment balcony, we’ve repurposed my favorite induction cooktop from the kitchen. You’ll need an outlet on your patio or an extension cable from inside.
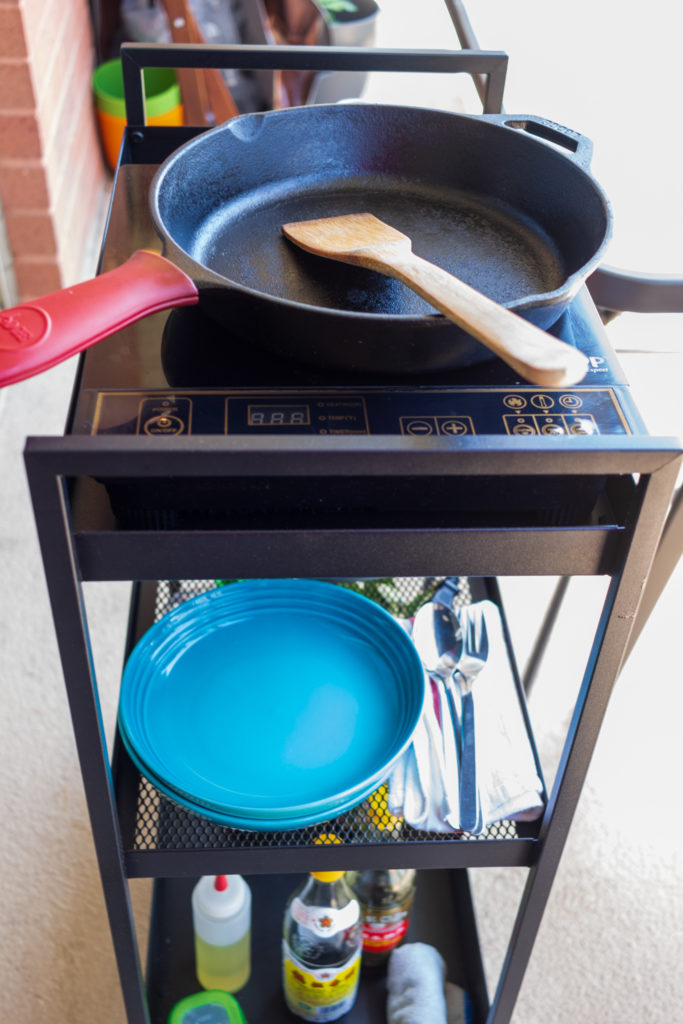
We actually have two portable induction hobs that cover close to 100% of our cooking year-round. Like gas, the heat response of induction is almost instantaneous, which is great for high heat wok cooking. We’ve owned three different models, and I’ve liked all three. On a budget, we have the older model Duxtop 8100MC (pictured with a Lodge 10″ cast iron skillet), which is clunkier but a great deal at ~$50. My favorite is the newer Duxtop 9600LS, which is sleek and features the finest heat controls, but it’s pricier at about $100. I can confirm both fit perfectly in our Nissafors cart.
Recommended with Reservations:
Click to ViewThe Ikea Tillreda is also a decent induction cooktop. Since ours suffered an untimely accident, I can’t confirm fit in the kitchen cart. The online dimensions look like it would be a tight fit.
Wirecutter likes the in-the-middle Duxtop 9100MC. I haven’t tested that model, but I’m confident based on our two Duxtops that it would work well.
What is induction anyway?
Induction cooktops use electromagnetic induction rather instead of thermal induction in traditional (gas or electric) cooktops. In Chinese, induction cooktop is 电磁炉 (diàn cí lú).
If you’ve ever been to a hotpot restaurant, you’ve used an induction cooktop to keep your hotpot soup boiling. When winter rolls around, use your induction cooktop to have a hotpot party! I’ll write a piece on how to eat hotpot at home when winter hotpot season rolls around again.
The benefit of induction is energy efficiency in a compact footprint. Because the magnetic field creates heat directly in the pan, there is less loss of energy compared to thermal induction. The cooking surface is also cool to the touch (except residual heat from the pan) — great for safety around kids and counter-surfing cats.
Induction Cookware
The only real downside is that this magnetic field requires your pan to be magnetic. Cast iron (both enameled and bare), carbon steel, and 18/10 stainless steel pans (including tri-ply clad) are always induction-friendly. Test out your cookware for induction compatibility by seeing if an ordinary kitchen magnet sticks to the bottom: if it does, you’re good to go. Here are a few of my personal favorites:
A Small Worktop
To make the top tier of the Nissafors cart a bit more cooking-friendly, we got an Ikea Proppmatt cutting board. It’s a bit smaller and thinner than the top shelf of the cart. However, for small outdoor prep like cutting fruit it’s been perfect for us. There’s also a slightly larger Proppmatt that would also fit. Please be careful with this setup, as the Nissafors cart does not have locking wheels.
How are you bringing the outside in?
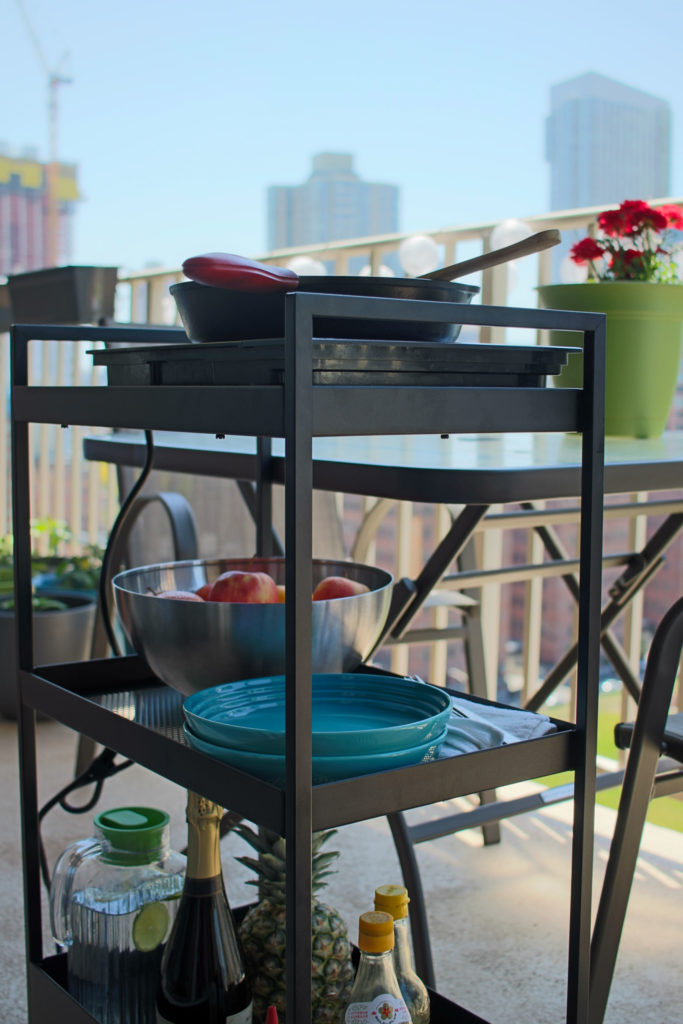
It was only four items for our “outdoor kitchen”. And every one is useful inside year-round. Combined with our folding outdoor table, a couple lightweight chairs, and plenty of plant babies, our apartment patio upgrade is complete!
Stay tuned for a few new recipes in the coming weeks featuring the tiny outdoor kitchen! We’ve been using our outdoor space whenever possible. Come cook with us outside and enjoy the sunshine!
Share your outdoor cooking setup! Leave a comment down below or share on Instagram with hashtag #thericelover
5 replies on “My Apartment Patio Tiny Outdoor Kitchen”
Great job! I love it.
Very creative, looks attractive for city dwellers.
So clever and handy! I love it and yes do post about having a hotpot party! I miss hotpot so much right now.
I’ve been trying to figure out how to sear sous vide steaks in my apt with super sensitive smoke detectors. This setup my be the answer I’ve been searching for.
Yes, it would be perfect for this! I use it all the time for deep frying and smoky searing.